With Point Central we have the ability to monitor out ACME properties. We may allow remote access, change thermostat settings, view property activity, create and change key codes with a click of our mouse.
When opening Point Central you a greeted at the Dashboard.

- Search for the desired property
- Then select,

- Once you have, you will see what kind of point central equipment is installed in the selected property.
Point Central Remote Access:
Although each property is required to have the Point Central system installed, they are all still unique. Some properties may only have the front door keypad, this function allows ACME to unlock/lock the property remotely with just a simple click. 
Point Central Wi-fi Switch:
The "Lights/Wi-Fi" switch is commonly used for the Wi-Fi equipment. Wi-Fi can be tricky at times and normally just requires a quick reset, with this switch we are able to assist in troubleshooting the Wi-Fi remotely by shutting it off and then back on again. 
Point Central Sensors and Activity:
Some properties have multiple sensors usually on the doors leading to patio/pool areas. These sensors are extremely beneficial to the entire point central system. They are able to provide a detail of when those doors were accessed. If a patio door sensor is left open for more than 5 minutes it will communicate to the thermostat to such off. 
Point Central Thermostat:
With the point central thermostat, we are able to assist in troubleshooting the settings remotely. Such as, changing the temperature, and changing the mode the system is in. 
By selecting Advanced Configuration, you are able to change the thermostat settings and limitations. 
Point Central Creating Access Codes:
With Point Central, we are able to create temporary access codes for vendors, guest and owners.
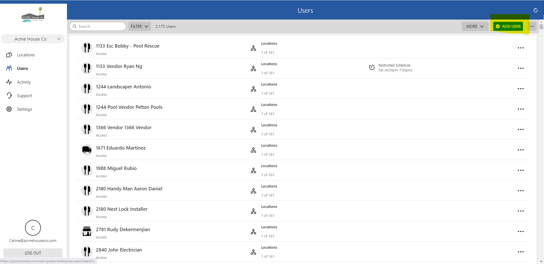
When opening point central you access the dashboard. On your left hand side you will see options to choose from, you will continue to click on "Users"

- Click on Users
- On your right click "Add User"

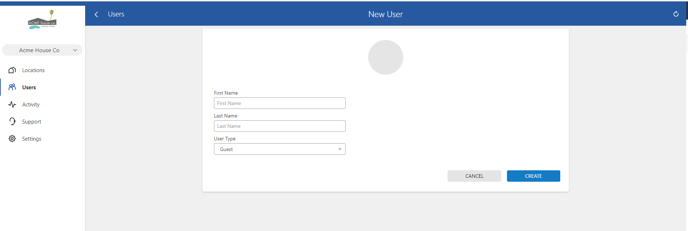
- Provide their information/ user type
- Create

- Input Date for Code to be activated and deactivate

- Access Type/ Set By Location

